
If you’re shooting in RAW, Adobe Camera Raw (ACR) is where your editing journey should begin. It’s the best place to fix exposure, enhance color, and recover detail before moving back to Photoshop for more creative work.
📷 Introduction: The Power of Camera Raw
This post isn’t a deep dive into every tool. Instead, I’ll guide you through the key sections I use for landscape and wildlife photography, explaining what each one does, when to use it, and why. You’ll learn how to:
- Set the right foundation (Profiles, Light, Color)
- Target specific improvements (Effects, Masks)
- Skip less useful tools (and save them for Photoshop)
By the end, you’ll know exactly where to start, what to ignore, and how to make global adjustments that give your RAW files clarity and depth — ready for creative refinements later.
Let’s dive in and turn your flat RAW file into a clean, balanced image ready for the next stage.
🧠 Tip: Before diving into adjustments, in Photoshop go to Filter > Convert for Smart Filters. This lets you revisit and tweak your Camera Raw settings later — non-destructively — using Smart Filters.
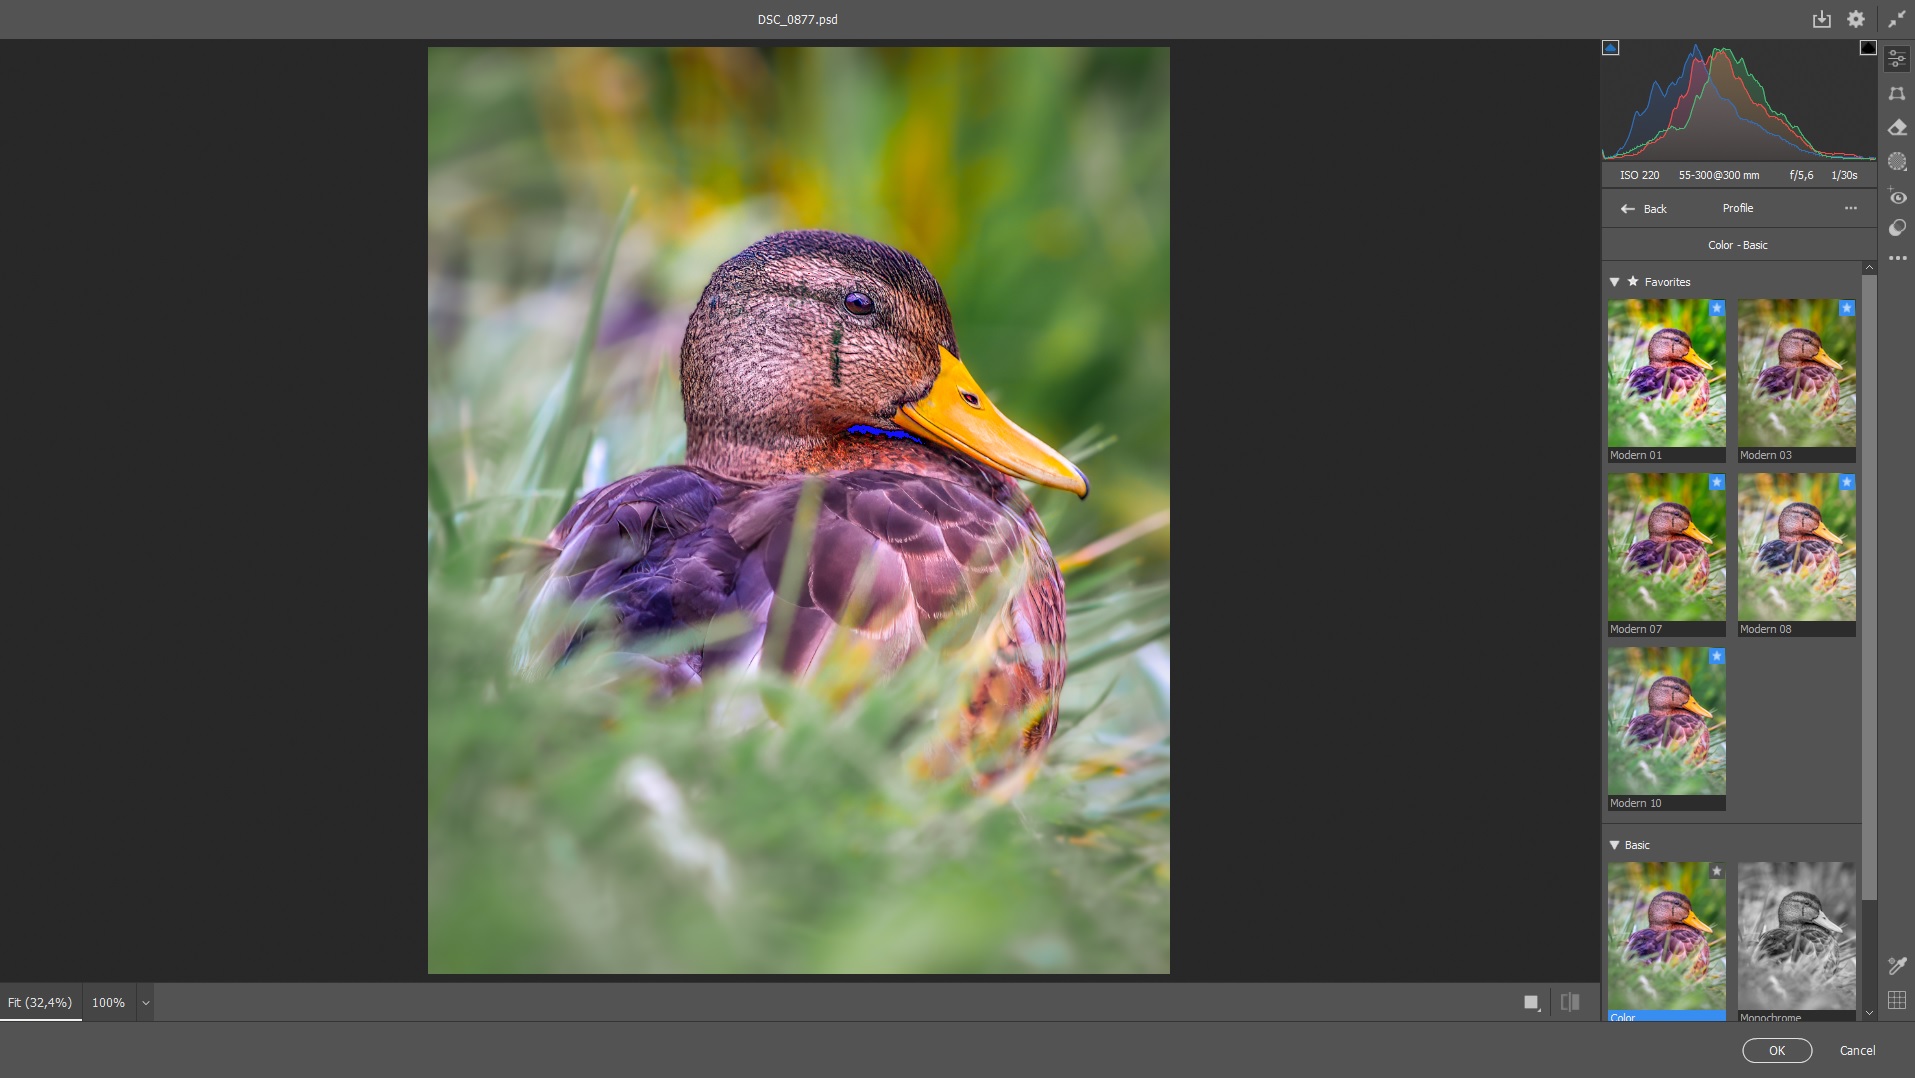
🎚️ 1. Profile: Set the Mood Before You Start
Before touching any sliders, choose a Camera Raw Profile — it sets the overall look of your photo by defining how colors and contrast are rendered. Think of it as your photo’s starting mood.
You’ll find the Profile Browser at the top of the Basic panel. Here are a few good options for nature photography:
- Adobe Landscape – Boosts contrast and color vibrance; great for dramatic skies and colorful scenes.
- Adobe Vivid – Stronger color and contrast, useful for punchy wildlife shots.
- Camera Matching Profiles – Match your in-camera settings (if you want a familiar look).
👉 Tip: Try different profiles before making other edits — they can dramatically change how the sliders behave afterward.
Once you’ve set the mood with a profile, you’re ready to dive into exposure, contrast, and color.
💡 2. Light Panel: Balance Exposure & Recover Details
This is where you fix exposure and make the image feel natural.
- Exposure – Adjust overall brightness. Keep it moderate — extreme changes are better handled with masks later.
- Contrast – Increases separation between lights and darks. Good for flat-looking RAW files.
- Highlights/Shadows – Recover detail in skies or backlit subjects. Pull highlights down for bright skies; lift shadows for dark animals or forest scenes.
- Whites/Blacks – Set true white and black points. Use Alt/Opt + drag to check for clipping.
👉 Pro Tip: Wildlife photos often need shadow recovery, while landscapes benefit from highlight control.


🎨 3. Color Panel: Get the Tones Just Right
Color temperature and tint affect the overall mood — warmth, coolness, or color casts.
- Temperature – Cooler (blue) tones work well for snow, fog, or overcast light. Warmer (yellow/orange) tones enhance sunrise/sunset.
- Tint – Adjust green/magenta balance. Helpful for correcting unnatural casts in foliage or fur.
- Vibrance – Boosts muted colors intelligently, protecting skin tones and avoiding oversaturation.
- Saturation – Boosts all colors equally — use it sparingly.
👉 Landscape Tip: Try a slightly warm tone with boosted vibrance for a natural, inviting look.

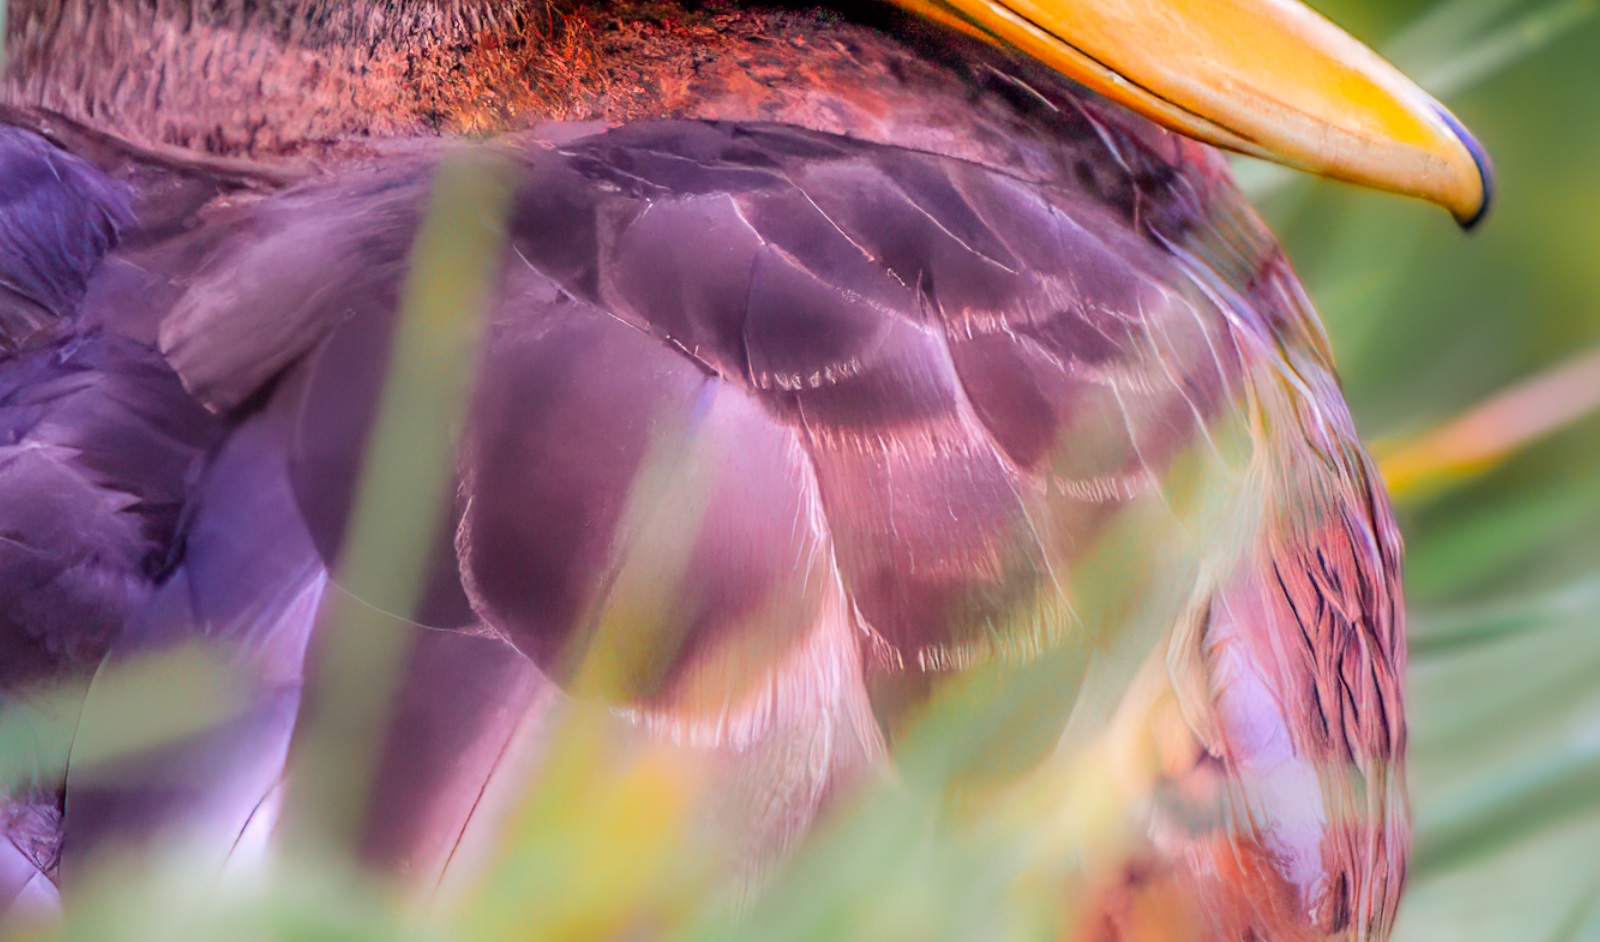
✨ 4. Effects: Add Texture & Depth
These tools can bring subtle drama or clarity to your images.
- Texture – Enhances fine details like bark, fur, or grass without making the image look crunchy.
- Clarity – Increases midtone contrast. Great for adding punch to rocks, skies, or feathers. Go easy on portraits.
- Dehaze – Removes fog or atmospheric haze. Use for misty valleys, rainy forests, or dramatic clouds. A little goes a long way.
👉 Wildlife Tip: A small texture boost on feathers or fur can make your subject stand out without looking fake.

🌈 5. Color Mixer & Color Grading: Fine-Tune the Look
🎛️ Color Mixer
This tool lets you control the intensity and hue of individual color ranges — ideal for precise tuning.
- Hue – Shift the tone of specific colors (e.g., make green trees lean toward yellow or blue).
- Saturation – Boost or reduce color intensity (e.g., tone down overly bright reds).
- Luminance – Adjust the brightness of a specific color. This will not affect other colors — great for enhancing a blue sky or deepening green fields.
🎨 Color Grading
This is where you can get creative with color moods.

Tint shadows, midtones, and highlights separately.
Use teal shadows + golden highlights for a cinematic feel.
Adjust Blending and Balance to fine-tune the effect.
👉 Tip: Keep it subtle — color grading is best when you feel it more than you see it.
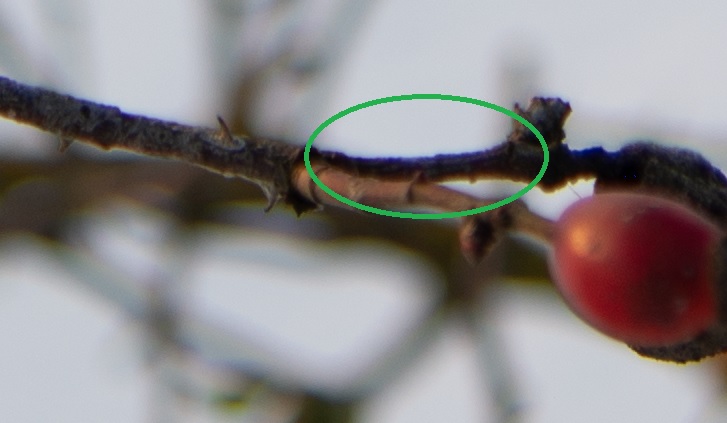
🔍 6. Optics: Clean Up Lens Issues
Defringe – Removes purple/green edges, known as color fringing. These occur where dark and light areas meet, like tree branches against skies or backlit fur. While “Remove Chromatic Aberration” fixes most cases, Defringe tackles stubborn high-contrast fringing. Simply:
- Zoom to 100%
- Sample fringe color with eyedropper
- Adjust sliders until edges clean up
📐 7. Transformation: Straighten & Correct Perspective
This panel helps correct lens quirks and awkward angles — great for straightening horizons in landscapes or tweaking wildlife shots.
Auto often fixes things in one click, while Level straightens when Auto goes too far. Full corrects everything but can warp natural scenes — use it sparingly.
For tricky shots, use Guided: draw lines along what should be straight, like trees or riverbanks. Fine-tune with manual sliders if needed.
👉 Landscape Tip: Use this to straighten horizons or fix wide-angle lens distortion in mountain scenes or architecture.
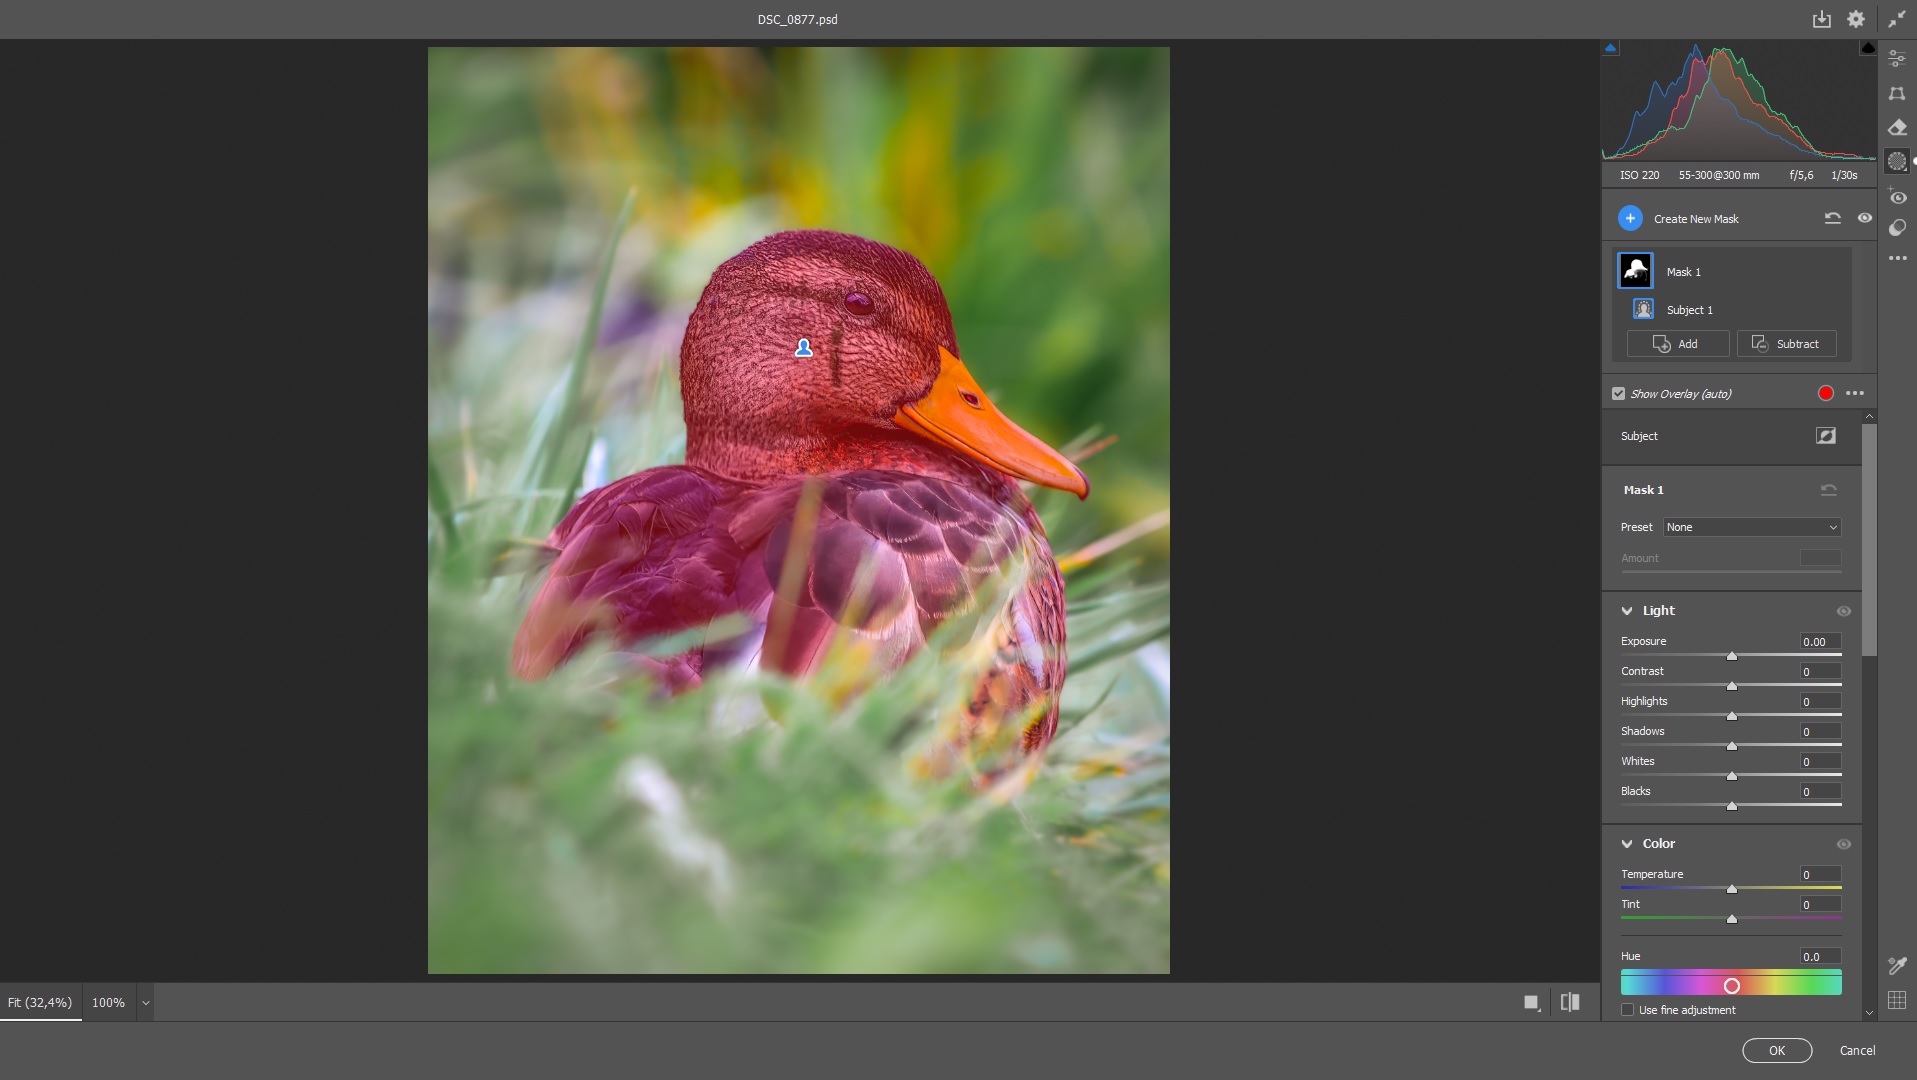
🖌️ 8. Masks: Targeted Adjustments Made Easy
Masks are one of the most powerful tools in Camera Raw. Use them to apply changes only where you want them.
Types of masks you might use:
- Linear Gradient – Darken skies or brighten a foreground.
- Radial Gradient – Spotlight a subject (like a bird or lone tree).
- Subject/Background/Objects – Automatically selects areas (works well for isolated wildlife).
- Brush – Manual control for tricky areas.
- The new Landscape Mask (2025) automatically detects skies, buildings, vegetation, and terrain — perfect for quickly adjusting specific elements.
👉 Wildlife Tip: Use a radial mask to subtly brighten eyes or faces in shaded environments.
🛠️ A Quick Note on Tools I Skip in Camera Raw
While this guide covers the core adjustments for nature photography, I intentionally avoid two tools in Camera Raw:
- Curves (I use Photoshop’s layer-based Curves for precision and masking).
- Removal/Healing (Photoshop’s Removal Tool, Spot Healing Brush and Clone Stamp offer more control on separate layers).
Why? For me, non-destructive editing is king — and Photoshop’s layers simply give more flexibility to revise edits later. But if you’re working fast, Camera Raw’s versions can still work in a pinch!
🧭 Final Thoughts: Build Confidence with Every Edit
Camera Raw is where your photo’s full potential starts to shine. As you get more comfortable with these tools, your workflow will feel more natural. Whether you’re trying to recover a foggy mountain view or bring out the fine textures in a fox’s fur, this step lays the foundation for all the creative work still to come.
Not every slider needs to be used every time. Start with what the photo needs — maybe just a profile change and some light adjustments — and build from there. Over time, you’ll develop an instinct for what works best in your own style.
💡 One Last Tip for Lightroom Users
All the adjustments covered in this guide (except Optics/Defringe) work identically in Lightroom Classic, since it shares Camera Raw’s processing engine. Feel free to follow along there — but remember: once you send your image to Photoshop, Lightroom adjustments become permanent.
💬 Ready to Try It?
What’s your favorite Camera Raw adjustment — or one you’re still figuring out? Let me know in the comments below! I’d love to hear how other landscape and wildlife photographers approach their RAW files.
📥 Starting from Lightroom? Check out my Lightroom workflow guide where I walk through importing, organizing, and preparing your RAW files before jumping into Photoshop and Camera Raw.
🛠️ Up next: Fine-Tuning in Photoshop
Once your RAW image is clean and balanced, it’s time for creative, selective edits — and Photoshop is where that magic happens. In the next posts, we’ll go beyond global adjustments and cover:
- Dodging & burning for depth and focus
- Sharpening and texture work
- Contrast shaping with curves
- Subtle color grading tricks
- Blur and vignetting for polish
Whether you’re finishing a moody mountain scene or sharpening the eyes of a golden eagle — this is where your photo really comes to life.
👉 Check back later, or subscribe so you don’t miss it!
Discover more from Shutter and Saddle
Subscribe to get the latest posts sent to your email.

One thought on “My Practical Camera Raw Workflow for Nature Photography”