
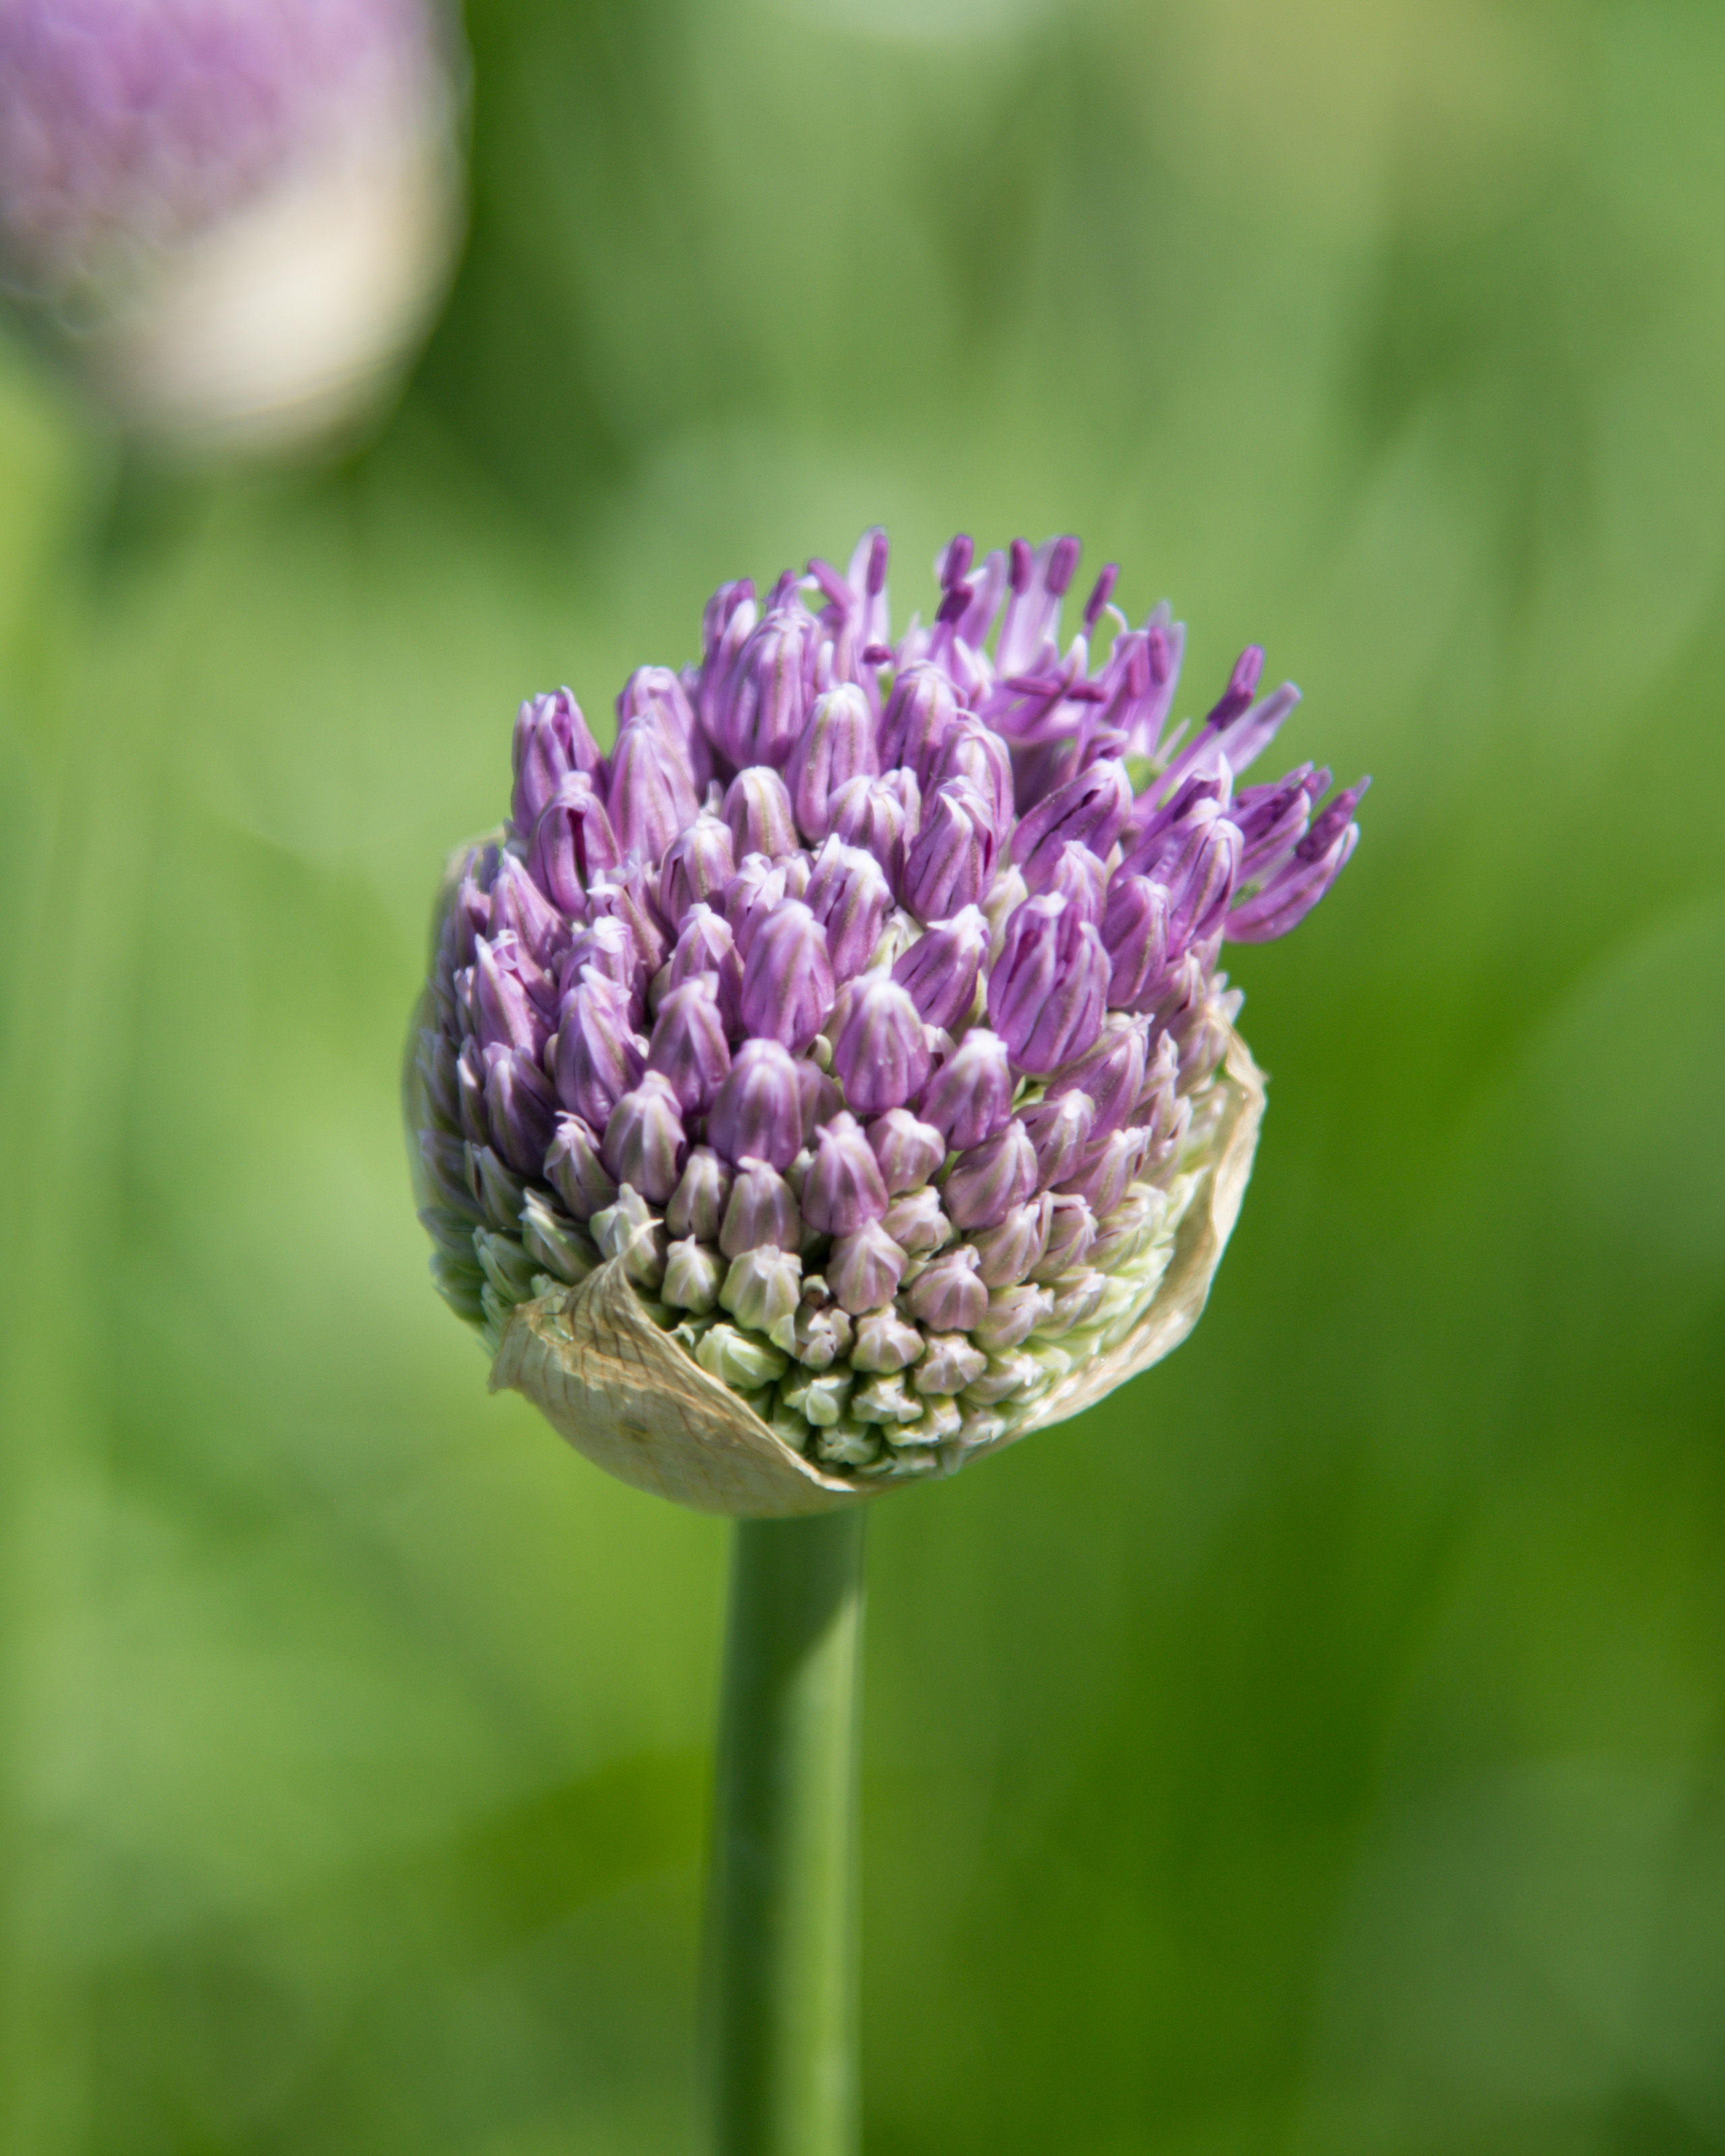

Whether you’ve just captured a bloom bathed in golden hour light or snapped a bright tulip at noon, editing your flower photos can transform them from simple snapshots into radiant, share-worthy images. In this beginner-friendly guide, I’ll walk you through how I edit flower photos using Lightroom or Camera Raw and add a soft, dreamy Photoshop glow for those magical sunset shots.
Before diving into these advanced edits, make sure you’ve followed my essential Lightroom preparation steps outlined in Lightroom’s Role in Editing: A 21-Step Workflow from Import to Final Export. These foundation adjustments will ensure you’re working with the best possible starting point.
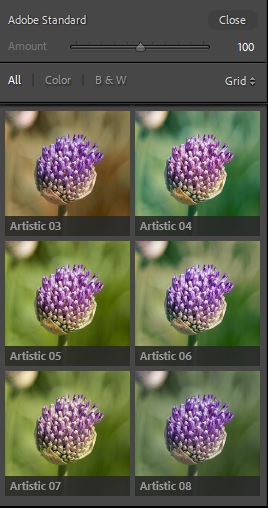
🌿 How to Edit Flower Photos in Lightroom (or Camera Raw)
Start with a Profile That Sets the Mood
Every photo starts with a mood, and your Profile sets the tone before you even touch a slider. For bright midday photos, I usually begin with Adobe Landscape — it brings out bold colors and adds vibrance to petals and leaves. But if the colors feel too punchy, switching to Adobe Color can help tone things down.
Golden hour shots are a different story. The warmer light often pairs beautifully with Adobe Color, but if you’re after a soft, painterly look, try Vintage 05. It mutes the saturation a little and gives you a blank canvas to work from.
💡 Think of profiles as “photo-wide presets” — they shape your entire image’s color and contrast before you begin fine-tuning.
Light & Contrast: Bringing Balance to Brights and Shadows
Next, I head to the Basic Panel — this is where the magic starts.
For midday photos, I typically lower the Highlights (around -40 to -60) to recover details in light-colored petals, and boost the Shadows (+20 to +40) to brighten darker foliage or background elements. Contrast gets a slight bump, and I carefully adjust Whites and Blacks while holding down Alt/Option — this helps avoid clipping the brightest or darkest areas.
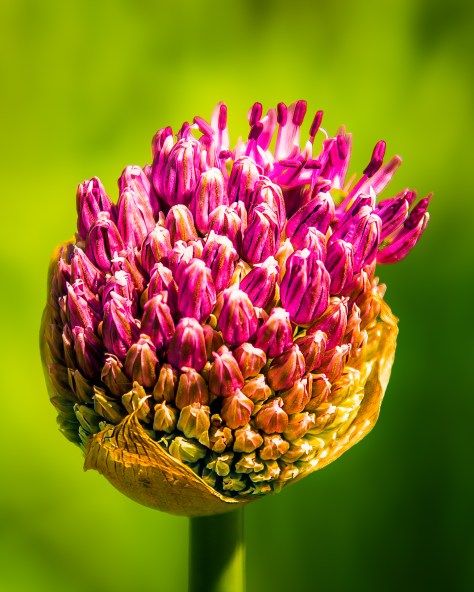
Golden hour edits are a bit warmer and softer. I increase Contrast more generously, reduce Highlights, and really open up the Shadows. Adding warmth with the Temp slider (+10 to +25) and a hint of pink/magenta using Tint makes the scene feel golden and glowy — just like it looked in person.
Enhancing Texture Without Losing the Natural Feel
In the Presence section, flower detail takes center stage.
On bright sunny days, I often boost Texture (+10 to +20) to bring out petal veins and fine details. A small Clarity boost adds structure, but too much can create halos — I keep it subtle. Vibrance is your best friend here, enhancing colors without pushing everything over the edge.
For golden hour shots, I do the opposite — dial down Texture and Clarity slightly to give petals a soft, velvety feel. It adds to that dreamy atmosphere.
💡 Overdoing Clarity can make flowers look crunchy — and nobody wants that!
Optional: Tone Curve for a Gentle Pop
The Tone Curve is like seasoning — not essential, but a pinch can elevate everything. I usually add a gentle S-curve to enhance contrast. For golden hour, lifting the darks a touch gives a soft, matte finish that feels cinematic.
Fine-Tune Flower Colors with HSL
The HSL panel (Hue, Saturation, Luminance) is perfect for tailoring your edit to the specific colors in your photo.
For example, in midday shots, I’ll often reduce the luminance of overly bright greens and yellows. I also lower the saturation of these colors if they steal attention from the flowers.
In golden hour photos, I shift Oranges and Yellows slightly left (Hue -10) and increase Saturation and Luminance. This boosts warmth and glow in petals and sunlight without turning things cartoonish. Greens get toned down too — a little Hue shift and lower Saturation keeps the focus on the flowers.

Effects: Add Atmosphere and Focus
A bit of Dehaze can add crispness to hazy midday shots, while a subtle Vignette draws the eye to the center. In golden hour edits, I reverse this. A small negative Dehaze softens the light further. A stronger Vignette emphasizes that glowing, dreamy feel.
Sharpening & Noise Control (Mostly for Midday)
For crisp midday photos, I add a little Sharpening (around 40), set Radius to 1.0, and use Masking (~50) to sharpen only the important details — petals, not sky. If there’s noise, especially from higher ISOs, I apply just enough Noise Reduction to smooth things out.
Don’t Forget Lens Corrections
Before wrapping up, I always enable Remove Chromatic Aberration and Profile Corrections — they fix color fringing and lens distortion automatically. It’s one of the easiest wins in any photo workflow.
Sync or Save Your Flower Edit as a Preset
Once I’m happy with one image, I sync the edits across similar shots — or better yet, save the settings as a custom preset. It saves tons of time, especially when you’re editing a whole bouquet of images!

✨ Photoshop Glow Effect for Golden Hour Flowers (Easy Tutorial)
Sometimes, golden hour light needs just a touch more magic — that’s where Photoshop comes in.
👉 Tip: Before stepping deeper into Photoshop, first remove any distracting elements. These might be stray leaves or background clutter. Do this on a separate layer. This keeps your main adjustments intact and your edit non-destructive.
Step 1: Add a Soft Glow Layer
I duplicate the photo layer, then go to Filter > Blur > Gaussian Blur, setting the blur to 15–30 pixels. Then, I change the blend mode to Soft Light for a gentle glow or Screen for a brighter, more ethereal effect. Finally, I lower the Opacity to around 20–40%, depending on how soft I want the result.
Step 2: Mask Out the Glow Where You Don’t Want It
Next, I add a black layer mask. Then I use a soft white brush to paint in the glow only where I want it. This is typically on the petals or warm highlights. I leave out shadows and fine detail areas to avoid muddying them.
Step 3 (Optional): Add Extra Warmth with Gradient Map
If I want to push the warmth further, I add a Gradient Map adjustment layer, setting it from dark orange to light yellow. Switching the blend mode to Soft Light creates a beautiful golden cast. Reducing opacity to around 10–30% enhances this effect. It’s perfect for a sunset photo of a glowing sunflower or rose.
📸 Final Flower Photography Editing Tips
- Use Lightroom presets to quickly apply your favorite styles
- Don’t be afraid to experiment — each flower reacts differently to light and color
- Golden hour light already does half the work — gentle edits go a long way
- Midday light is harsher, but with the right adjustments, you can still get stunning results
- Practice on different flowers, colors, and lighting — every photo teaches you something new
Did these flower editing tips help? Share your biggest ‘aha’ moment when trying them in the comments below! Which adjustment made the most difference in your photos? 🌸
Discover more from Shutter and Saddle
Subscribe to get the latest posts sent to your email.
