
📌 Introduction

A streamlined import and editing workflow keeps your photos organized and your edits non-destructive. Here’s my step-by-step process for bringing images into Lightroom and prepping them for Photoshop—perfect for single shots or large batches.
🖥️ Importing Photos into Lightroom
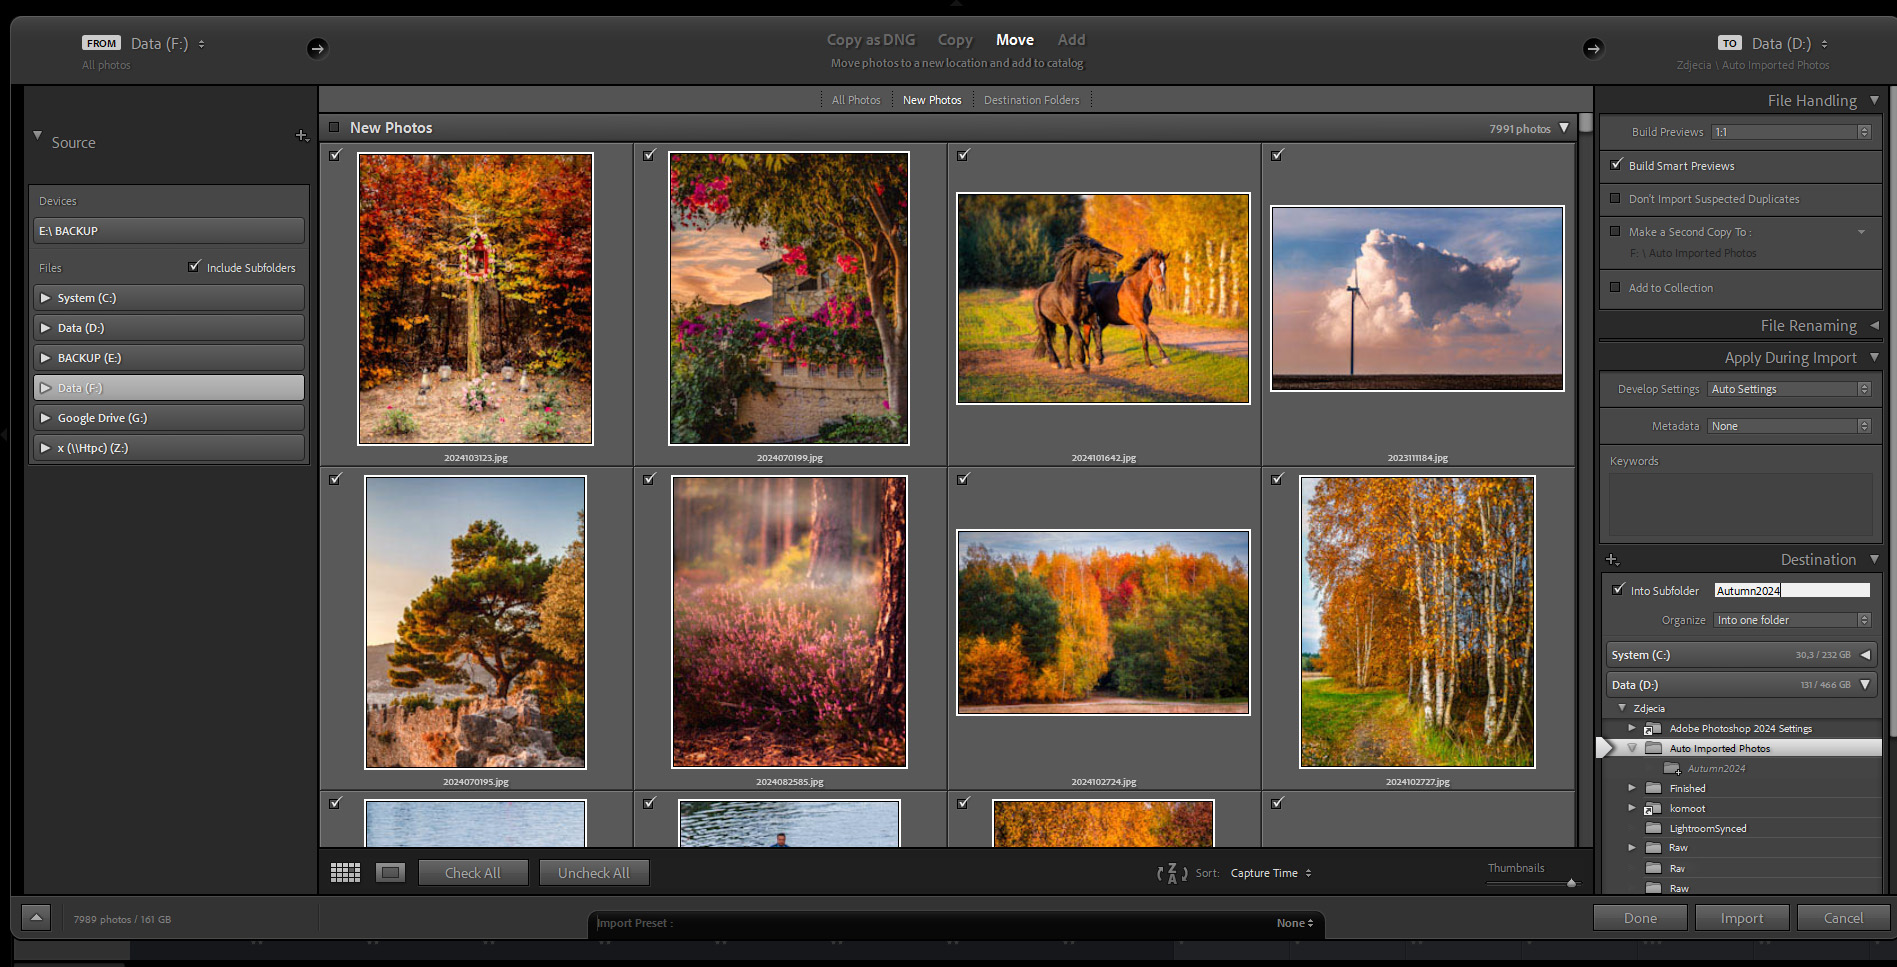
- Open Lightroom Library and hit Import.
- In the left-hand panel (Source), navigate to your files:
- Expand the folder tree to locate your images (e.g., SD card, external drive).
- Pro Tip: Check “Include Subfolders” if images are nested.
- Preview and select files in the main pane:
- Toggle between “Grid” (thumbnails) and “Loupe” (single-image) views.
- Use Shift/Ctrl+Click to multi-select.
- In the File Handling panel, select:
- Build Previews: 1:1 to generate full-resolution previews for accurate editing (avoids lag when zooming).
- Apply During Import: Auto Settings. This will apply Lightroom’s auto-adjustments as a starting point (saves time; can be tweaked later).
- (Optional) Build Smart Previews—allows editing without the original RAW file (useful for large files or working offline).
- Choose the destination folder:
- Primary folder (e.g. “Imported Photos”).
- For projects, to keep a structured archive, check “Into Subfolder” and name it (e.g., “2024-04_Roadtrip”).
- Click Import. Lightroom finalizes the import, copies (or references) files, builds previews, applies initial settings, and adds files to the catalog.
🎨 Initial Adjustments in Lightroom
- Switch to the Develop tab.
- Optional—Enhance the photo using:
- Denoise (for high ISO images)—reduces grain while preserving details (especially for low-light shots).
- Raw Details—improves sharpness and reduces artifacts in RAW files (uses AI for cleaner edges).
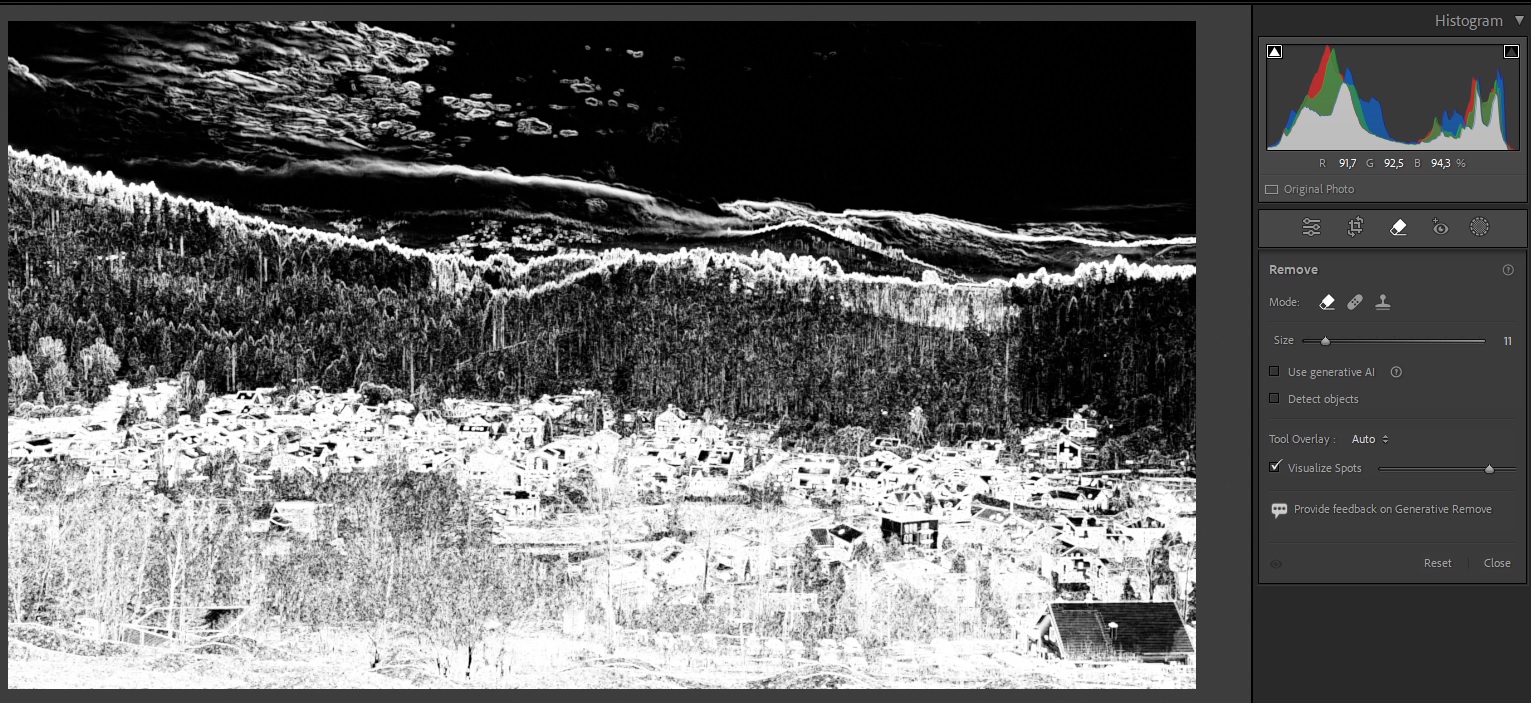
- Optional—Remove sensor dust spots.
- Use Spot Removal Tool + “Visualize Spots”, which highlights dust for easy removal (critical for clean skies or smooth surfaces).
- Leave complex distractions for Photoshop. Photoshop’s tools (e.g., Content-Aware Fill) handle these better.
- Optional—Basic crop with generous margin—remove distractions early and reduce PSD file size.
🛠️ Sending to Photoshop for Post-Processing
- Edit in Photoshop after basic adjustments.
- Reason: Lightroom lacks advanced tools (e.g., layers, advanced masking).
- Right-click the photo in Lightroom and select “Edit In > Photoshop”.
- Choose to edit the original file or the Lightroom-adjusted version.
- Make your edits in Photoshop, then save (Ctrl+S)—the file automatically returns to Lightroom as a TIFF/PSD.
- Repeat this process anytime by re-sending.
✂️ Final Adjustments in Lightroom
- Final crop (if needed).
- Apply vignetting selectively—draws focus to the subject subtly (avoid overuse).
- Optional—Rename the file in Lightroom Library.
- Apply keyword using an Auto-Keyword plugin, which automates metadata for SEO/organization (e.g., “landscape,” “sunset”).
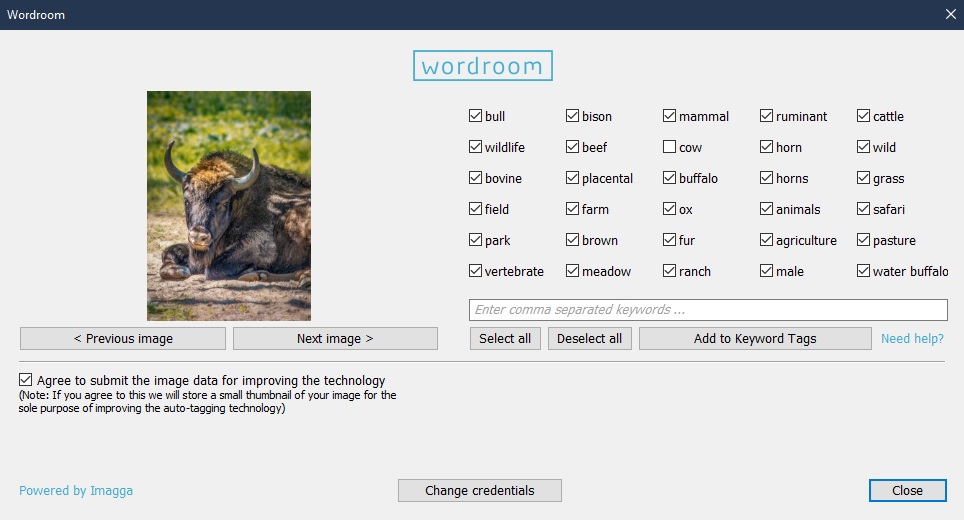
My recommendation—Wordroom—a free Lightroom plugin that uses AI to automatically generate keywords and tags, saving hours of manual work.
📤️ Exporting and Organizing
- Export with presets:
- Full-resolution JPEG.
- Optimized JPEG for social media or web platforms.
- Upload to Flickr etc.
- For better organization, group related photos into Collections.
- Move RAW/PSD to an archive folder in Lightroom.
- Within Lightroom Library, move the edited RAW/PSD file to an archive folder for long-term archiving. (Important: Do this in Lightroom rather than via file explorer to maintain the development history.)
🗃️ Backup and Archiving
- Back up your photos to multiple locations:
- Utilize the “3-2-1 Rule” (3 copies, 2 media types, 1 offsite) to prevent data loss:
- Cloud.
- NAS.
- External Drive.
- USB Drive.
💡 Key Workflow Principles:
- Non-destructive editing: RAW adjustments, Smart Previews, and layers in Photoshop preserve originals.
- Efficiency: Auto Settings and plugins save time on repetitive tasks.
- Flexibility: Lightroom’s non-destructive tools (cropping margins, Virtual Copies, and round-trip Photoshop edits) keep options open at every stage.
By following this structured workflow, I ensure that my files stay well-organized, easily accessible, and safely backed up. This method also allows for an efficient and non-destructive editing process, from initial import to final delivery.
▶ Next Steps:
Ready for Photoshop? First, optimize your RAW file using these Camera Raw techniques — most work in Lightroom too!
Discover more from Shutter and Saddle
Subscribe to get the latest posts sent to your email.

❤️💌❤️
LikeLiked by 1 person
🙂🙂
LikeLike