
A quiet winter walk — frost, muted light, and snow kept neutral to preserve a calm, welcoming winter mood
Winter has its own rhythm. For me, it usually starts around mid‑November, when roads turn white not just from snow, but from salt — and riding outside slowly gives way to hours on the indoor trainer. Long walks replace long rides, and the camera becomes an excuse to step outside when the cold feels sharpest.
That’s also when winter photography truly begins.
In this tutorial:
- How to keep snow neutral and clean.
- How to build a frosty winter mood without harsh contrast.
- How to introduce warmth without breaking the cold feel.
- How I split the work between Camera Raw/Lightroom and Photoshop.
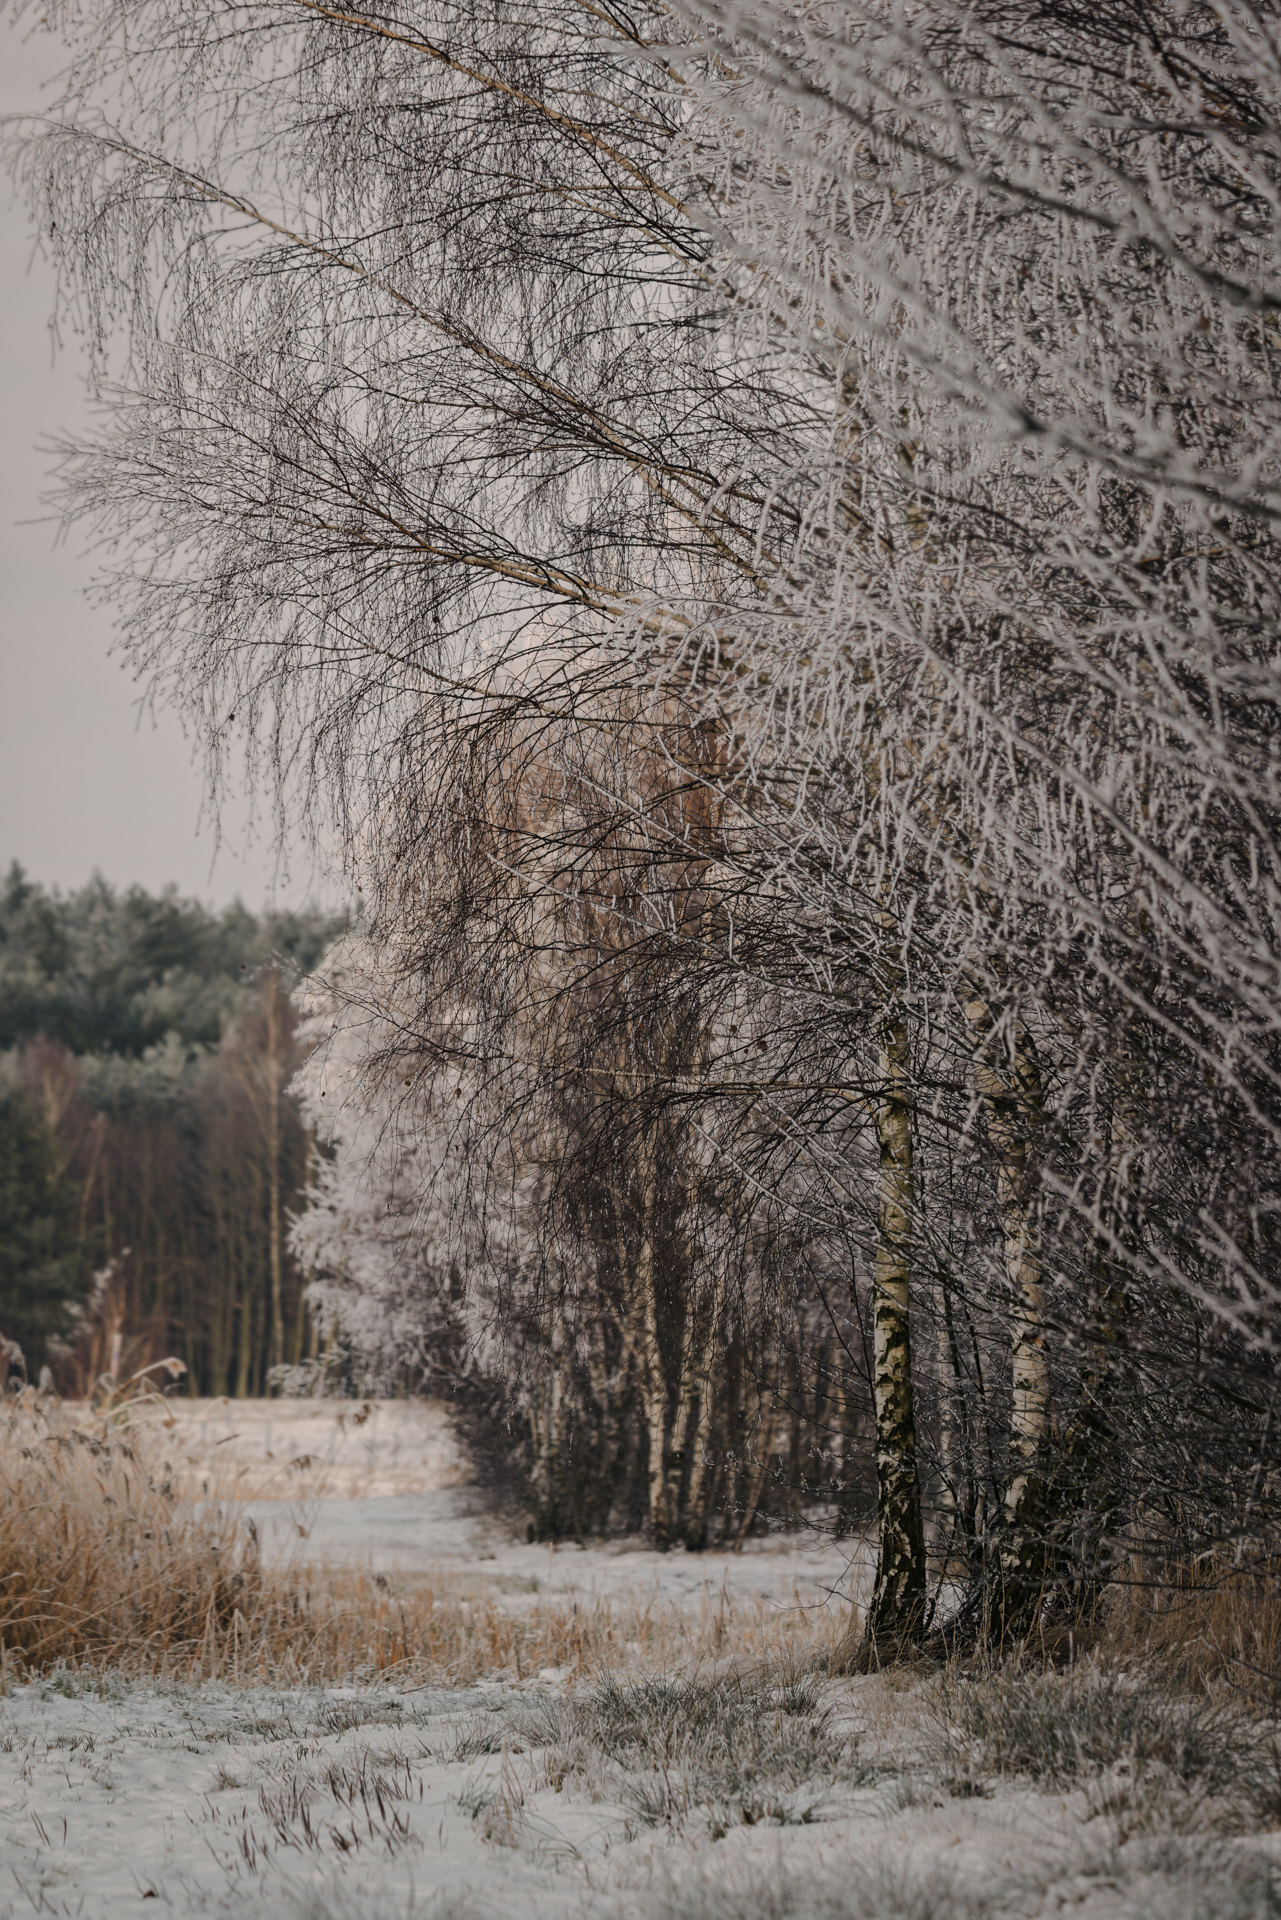
This image was taken during one of those quiet walks — a frosty edge of woodland, muted light, snow that’s present but not dominant. Scenes like this look calm in reality, but translating that feeling into a photo is rarely straightforward. Winter edits are a balancing act: cool, but not lifeless; quiet, but not flat; frosty, yet still welcoming.
What follows is how I approached this image — not as a preset or recipe, but as a way of thinking about winter mood in Camera Raw (or Lightroom), with a few finishing touches in Photoshop.
Stage 1 — Setting the Winter Base (Camera Raw / Lightroom)
Core idea: Establish the winter atmosphere before adding contrast or color drama.
Before touching contrast or color, I define what kind of winter I’m dealing with. This wasn’t a dramatic storm or harsh light — it was subdued, soft, and slightly melancholic. That meant starting gently.
Exposure was pulled back just enough to stop the snow from feeling bright or cheerful. Highlights came down early — frost and snow lose their character quickly if they’re allowed to clip. Shadows, on the other hand, were lifted slightly to keep the tree line readable without destroying depth.
I moved the Temperature slider cooler, but only modestly. The goal wasn’t blue snow — it was neutral snow in a cold environment. Winter often feels colder when whites stay white, not cyan.
At this stage, I also reduce Vibrance a little. Winter colors are naturally limited, and forcing them back usually breaks the mood rather than enhancing it.
Camera Raw reference (not a preset):
- Exposure: slightly down
- Highlights: clearly down
- Shadows: slightly up
- Temperature: gently cooler
- Vibrance: slightly reduced
Tip: If your snow starts to look blue or grey this early, stop — it usually means the Temperature or Highlights are being pushed too far.
Stage 2 — Shaping Mood, Not Drama
Core idea: Contrast should describe structure, not create impact.
With the base in place, contrast becomes the main tool — but it must be used carefully.
Instead of pushing global contrast, I prefer a gentle Tone Curve: slightly deeper shadows, controlled highlights, and stable midtones. This keeps the scene calm while still giving structure to the trees and frost.
Clarity is one of the most dangerous sliders in winter — especially with frost and snow.
Texture vs. Clarity (quick rule):
- Texture preserves fine detail.
- Clarity increases edge contrast (and in winter scenes, too much quickly feels artificial).
That’s why Clarity was reduced slightly here, while Texture stayed close to neutral. Frost looks sharp already — adding Clarity often makes it crunchy and artificial.
Dehaze was nudged in the negative direction. Winter air often feels heavy and soft, and removing too much haze can strip that away.
If you’re interested in a deeper look at building depth without overdoing contrast, I explored a similar approach in Winter Layers: Composition & Post‑Processing Breakdown — the ideas overlap nicely here.
Stage 3 — Color: Cold Outside, Warm Inside
Core idea: Warmth belongs in the midtones, not in the snow or highlights.
This is where the image really finds its character.
Rather than warming the whole frame, I allow warmth only where it naturally exists — in tree trunks, dry grasses, and subtle midtones. Highlights were kept neutral, shadows slightly cool. This separation is what keeps the photo wintery while still feeling human and approachable.
In the HSL panel, greens and blues were gently desaturated and adjusted slightly in luminance.
Color control checklist:
- Snow stays neutral.
- Greens don’t dominate.
- Blues support the mood, not attention.
The goal wasn’t to remove color, but to make sure nothing pulled attention away from the overall calm.
Stage 4 — Finishing Touches in Photoshop
Core idea: Local refinement, not global changes.
Once the global mood felt right, I brought the image into Photoshop for a few quiet refinements.
A soft Curves adjustment added just a touch more depth without changing the color balance.
Photoshop tools used:
- Curves (gentle tonal refinement)
- Dodge & Burn (very subtle)
- No heavy vignettes or dramatic local contrast
From there, very subtle dodging and burning helped guide the eye — brightening small patches of snow and letting the edges fall away slightly.
No heavy local edits, no dramatic vignettes. Winter scenes don’t need much help — they need restraint.
Quick checklist I often use at this stage:
- Is the snow still neutral?
- Do shadows feel cold but not empty?
- Does the image invite a pause rather than demand attention?
If the answers are yes, I stop.
Final Thoughts — Editing Winter Like a Walk, Not a Sprint 🚶♂️
Key takeaway: Winter mood comes from restraint, not strength.
During the months when cycling moves indoors and the landscape slows down, photography becomes less about chasing moments and more about noticing them. Editing winter photos follows the same rhythm.
This image wasn’t about making winter look dramatic — it was about keeping it quiet, slightly cold, but still welcoming. Snow stays white, frost stays soft, and warmth survives in the small details.
If you’re shooting winter scenes during hikes, recovery walks, or those in‑between months when riding is limited — this kind of approach might help your photos feel closer to how winter actually feels.
And if you’d like to explore another winter‑focused workflow, you might also enjoy: From Haze to Highlight: My Winter Landscape Workflow.
Sometimes the best edits, just like winter rides, are the ones that know when to slow down.
You’ll find more editing notes, winter workflows, and behind-the-edit guides like this in Ride Photo Lab — shared slowly, just like the season itself.
Discover more from Shutter and Saddle
Subscribe to get the latest posts sent to your email.

Lovely image and composition as always 🙏
LikeLiked by 1 person
Thank you so much, Mark! Really appreciate that – especially coming from you. 🙏🏻
LikeLiked by 1 person